Clearly Better Polymer stamps from My Stamps
| Who is My Stamps | Who is Cathy Daulman |
| What is Privacy | What is Secure Shopping |
| Links & Things |
Copyright Information
Yes, you MAY sell cards which you have hand stamped
using My Stamps
My Stamps is an ‘Angel Company’. We recognize
and appreciate the part artists and crafters play in the evolution of stamping
as an art craft. We appreciate that their work gives our stamps life. We
consider work created and sold using Cathy’s designs not to be an infringement
of copyright providing the images used were each individually hand stamped
by the selling artist. Any reproduction or copy of Cathy's designs by any
other means, eg graphic, photographic including photocopying, electronic,
mechanical or otherwise without the express written permission of the Author
remains in conflict with the law.
Copyright 1992 - 2005 Cathy Daulman applies to all graphic and written material
herein unless credited otherwise
These
pages have been optimised for Itnernet Explorer v6+. Most effects etc will
operate under IE5 + but we do suggest that you upgrade to the latest version.
Internet
Explorer
NOTE:
Pleaase ensure that your type size is set on medium or smaller (click <VIEW>
<TEXT SIZE> <MEDIUM> or <SMALLER>)

Supa-stampy-
fabulistic-in-my-
house-creations
Part
1
by Cathy Daulman
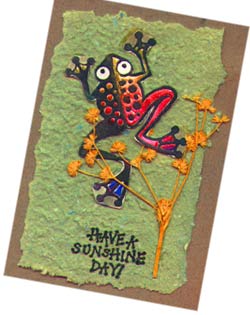
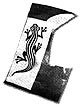
Coke Can Frog
Freezer
Film
Freezer film
(such as Glad Go-Between) is a high-density film that's used to prevent
food items from sticking together in the freezer. This non-stick characteristic
means it can be used in an unusual way when preparing to apply foil. The
usual practice, when foiling; is to stamp and emboss an image on cardstock,
cover the open areas with glue (I use a Sailor Rolling Ball pen), and,
once dry (allow at least an hour), to rub the foil, dull side down, onto
the now-tacky glued areas.
However, what can you do when there's no time to foil immediately? Freezer
film comes to the rescue! The freezer film will stick to the glue, keeping
it dust free, but it will lift off easi1y when you have time to do the
foiling at a later stage -even 6 months to a year later!
Cling Wrap
Plastic cling wrap is fantastic for creating interesting surface designs. To make marble backgrounds, first drop a couple of blobs of Marvy Metallic Marker or Pentel Metallic Paint Marker onto black, gloss card and lighdy spray with water. Cover these blobs with cling wrap, and then crinkle and squish the clingwrap and set aside to dry. Remove the cling wrap to reveal a gorgeous marble effect. The same technique can also be used with watercolours on saturated watercolour paper.
![]()
Lemons
Have you ever impressed kids with secret writing? Using a brush or calligraphy
nib, write with lemon juice on paper and allow to dry. When heated with
a heat gun or iron, delightful antique looking writing appears. Try this
with your stamps too.
Saturate a sponge with lemon juice and use this as your 'pad' to ink your
stamp. Stamp onto paper or card and allow to dry. When heated, the stamped
image will appear in a delightful brownish colour. Try cutting a lemon in
half and stamping it directly onto paper. Then heat, as above.
This technique also works using grapefruit.
Page
2
Bet you didn't know that
cling wrap can also be used as glue! Place a piece of cling wrap between
tissue or thin Washi paper and a piece of card and press with a hot iron.
The heat will melt the cling wrap, fusing the tissue to the card. This also
works really well when bonding a paper serviette to card, or when bonding
two different coloured tissue papers (or similar) to create a "duo-paper".
And apparently, the cheaper the cling wrap, the better it works!
Wax
Wrap
For an out-of-the-ordinary
background, crumple wax wrap and place it on a piece of white gloss card.
Place another piece of plain paper over and press with a hot iron. Remove
the paper and lift off the wax wrap. You will notice that the gloss card
now appears to be 'water-marked'. The heat has transferred the wax from
the wax wrap to the card, forming an all-over pattern. This can now be used
as is for the water-mark look. Or brayer with dye ink and the wax will resist
the ink, creating an interesting background.
In the Cupboard
Candles
To create a personalised
and decorated .gift candle, use a heat gun to gently heat the surface of
a candle to soften, and then stamp into the softened wax with pigment ink.
Allow to cool and remove stamp. Rub the stamped area with Luriliere acrylic
paint, Pearl Ex or rub ons. You can also paint the candle with Lumiere paint
before stamping.
Aluminium Soda
Cans
When
cut, opened and flattened (ends removed), aluminium cans have a multitude
of uses. One is to stamp an image on double-sided sticker paper, cut image
area out roughly, remove the protective backing, and stick image onto an
opened and flattened aluminium can. Now, cut the image out carefully - very
carefully unless you want to add Band
Aids to the kitchen stamping section! Manipulate the cut out stamped image
into a 3D shape. These make great fridge magnets (with a magnet adhered
to the back, of course), and they look really effective with bug and lizard
images. Because of the sharp edges, remember to keep the completed pieces
away from inquisitive toddlers!
You can also use the flattened cans as picture frames. Cut to shape, dry emboss, punch with metal punches and paint with Lumiere paint. In fact, these cans can replace aluminium shim in most applications.
Christmas has gone, the school holidays are over, and the kids are back at school. At last we have time again to retreat to our special space for some serious stamping. But there's a slight problem. The holiday activities have severely depleted the finances and we're broke! Only one thing to do. Raid the house for stamping supplies! Over the next few issues of The Rubber Gazette, I'll provide ideas and tips on how to use common household products to enhance and extend your stamping supply kit. It's great fun, and the money saved cart be spent on those stamping goods we so desperately need, that we can't raid the house for.
In this first article, I'll ransack the kitchen for handy items, and share some of the wonderful things that can be created with them.
Rolls of Stuff
Baking Parchment
Baking parchment (such as Glad Bake or Multix Bake) is a poor stamper's
Teflon sheet. I always use baking parchment as my paint palette when using
Jacquard Lumiere acrylic paint and Jacquard Neopaque paints. I even save
these coated pieces of baking parchment! When the 'palette' is used up
and dry I heat it with a heat gun. The paint wrinkles and can be peeled
off and used to enhance collage work. It also looks great attached to
the back of permanently stamped clear laminate. Try making a thicker skin
by painting the baking parchment with many layers of Lumiere. Heat the
same way and stitch this flexible skin to stamped fabric.
This product is also useful with Opals embossing enamel or UTEE (Ultra
Thick Embossing Enamel). Smear your baking parchment with pigment ink.
Sprinkle with Opals or UTEE and heat to melt the powder. Sprinkle and
heat twice more. After heating the third layer, fold the Opals or UTEE
and the baking
parchment back over itself, giving twice the depth and half the area..
Open up, heat again, and quickly stamp into this melted Opals or UTEE
with an inked
stamp. Allow to cool and remove the stamp. Peel baking parchment off the
back of the stamped piece and place the Opals or UTEE onto double-sided
sticker paper (such as JAC) to protect the fragile piece from breaking.
When you want to use it, simply remove the backing sheet and attach to
your artwork.